
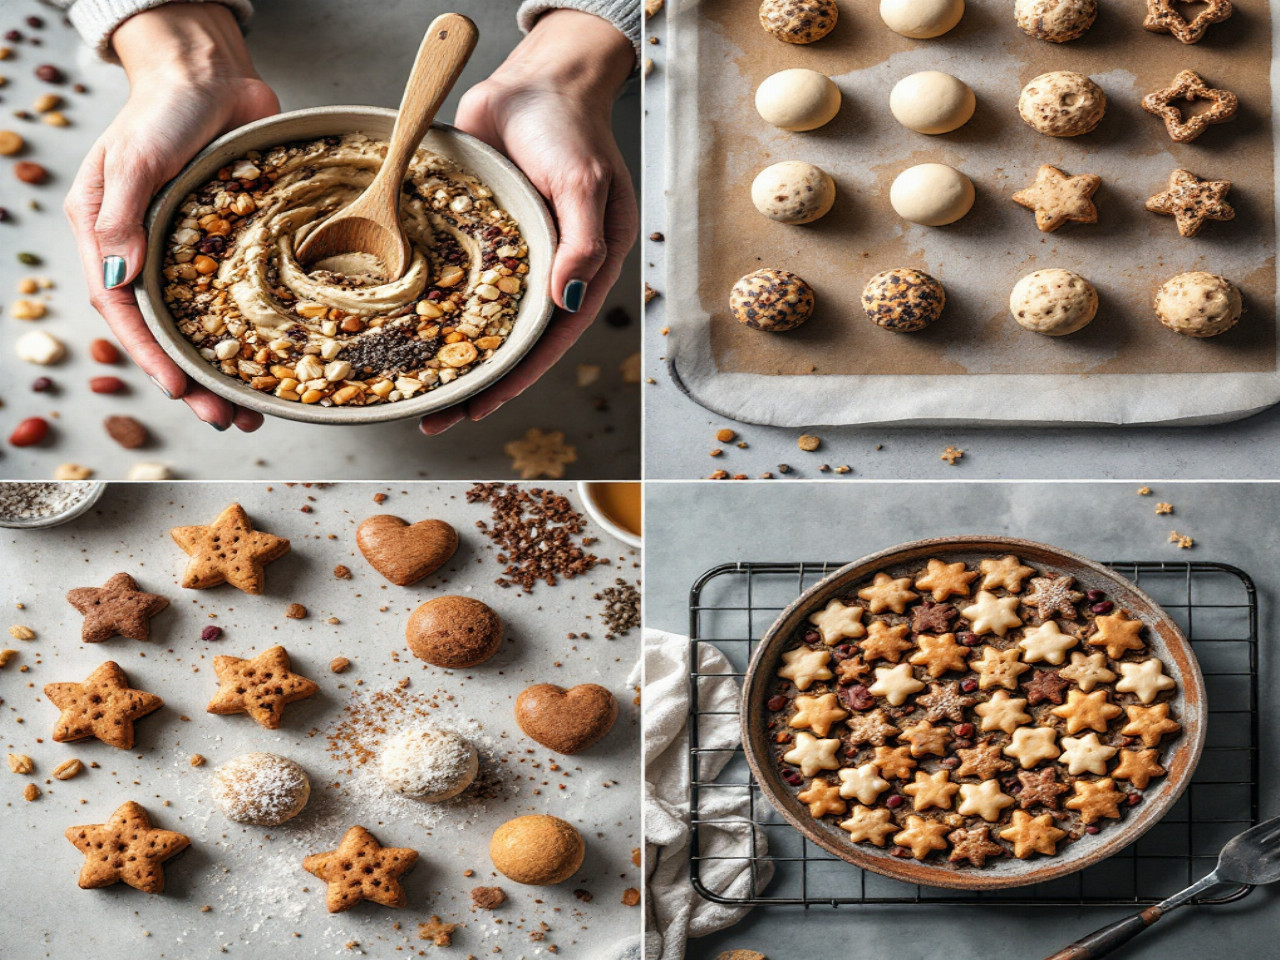

Do you dream of guilt-free treats to snack on without moderation? Rather than buying industrial products often loaded with sugars and additives, this tutorial will guide you step by step to create healthy and delicious homemade treats. In five very concrete steps, we go from selecting ingredients to optimal storage. At each stage, you will find practical advice, examples, and alternatives to compose sweets truly suited to your needs and tastes.
Why choose healthy homemade treats?
When we talk about snacks, we often imagine industrial energy bars or sugar-packed cookies. In reality, making your own sweets allows you to control the quality, experiment with original flavors, and, above all, limit unnecessary ingredients. You can reduce the glycemic load, ban palm oil, include oilseeds rich in good fatty acids, or enjoy the benefits of local honey. It is also a way to give meaning back to what you eat: every spoonful is the result of your choices, your tests, and your creativity.
Step 1: Choose quality ingredients

Select nutritious bases
The structure of a healthy treat often relies on dried fruit purees (prunes, dates, figs) or alternative flours (oats, almond, chickpea). These ingredients provide fiber, plant proteins, and satiety. For example, blending 200 g of pitted dates with 80 g of oat flakes creates a sticky dough ideal for forming energy bites. If you want a softer consistency, consider adding cooked fruit purees (banana, squash) or legumes (white beans to partially replace flour).
Prefer natural sugar alternatives
Honey, maple syrup, or yacon syrup offer adjustable sweetness, often with a lower glycemic index than refined sugar. You can also try coconut sugar, whose caramel aroma pairs well with spices. The idea is not to over-sweeten but to rebalance your dessert so it remains a treat: 30 g of syrup is often enough to achieve a tasty result without excess.
Focus on healthy spices and flavors
Cinnamon, vanilla, cardamom, ginger… These spices not only enhance taste; some have antioxidant or digestive properties. A hint of turmeric with a bit of black pepper turns your bites into little anti-inflammatory allies. For a festive scent, consider orange blossom water: a few drops in cookie dough work wonders.
Step 2: Plan your recipes and establish proportions
Calculate the macro-nutritional balance
Before you start, take a few minutes to anticipate the distribution of carbohydrates, fats, and proteins. Want a post-workout bar? Increase the protein proportion (whey powder, hemp seeds). If it’s a morning treat, favor a bit more complex carbs (oats, puffed quinoa). You don’t need a fancy spreadsheet: a simple rule is to aim for 50% carbohydrates, 30% fats, and 20% proteins for a complete snack.
Adapt portions to your needs
You can prepare a large container of bites to keep in the freezer or small individual bags for the office. Calculate the number of pieces and their weight: 15 bites of 25 g will give you 375 g of snack, perfect for 3 to 4 days. On each bag, note the date and recipe type: this ensures you always consume fresh products.
Step 3: Preparation and cooking techniques
Hydration and texture: tips for a perfect consistency
The amount of liquid (water, plant milk, compote) influences the texture. Too dry, your mixture won’t bind; too wet, it will stick to your fingers. By testing with a 50 g sample, you will quickly see if the ratio is right. Sometimes, swapping half the water for Greek yogurt adds softness and rebalances the nutritional aspect.
Cooking Without Risk of Overcooking
Cookies and bars bake for 10 to 15 minutes at 160 °C in a preheated oven. If you opt for raw bites, a 2-hour stint in the fridge is enough to firm them up. Use a kitchen thermometer or check the color: a too dark brown indicates the start of excessive caramelization, which can alter the nutrients.
Step 4: Shape and Structure Your Treats
Cookie Cutters, Molds, and Creativity
Presentation has a strong psychological impact. Heart, star, or small cube shapes immediately make them more appealing. You can use silicone molds suitable for cold or oven use, or shape small balls by hand. A tip is to lightly grease your hands with coconut oil to prevent the dough from sticking.
Healthy Decorations: Seeds, Dried Fruits, and Raw Chocolate
Sprinkle your creations with chia seeds, grated coconut, or 70% cocoa chocolate shavings. For a “pro” effect, dip half of each bite in melted chocolate, then immediately sprinkle with goji berries or pumpkin seeds. Not only is it aesthetic, but it also provides an extra boost of antioxidants and essential fatty acids.
Step 5: Storage and Preservation to Maintain Freshness
Suitable Packaging and Labeling
To keep the crunchiness or softness, choose airtight boxes or resealable bags. Vacuum sealing is not essential but limits oxidation. Prepare sticky labels to write the manufacturing date and the type of treat. This way, you will always know what awaits you at the back of the cupboard.
Shelf Life and Signs of Deterioration
As a general rule, raw bites keep for 5 to 7 days in the refrigerator and 2 to 3 months in the freezer. Baked cookies can last 10 days in a box at room temperature. Check the texture, smell, and any condensation inside the container: as soon as something changes, don’t take any risks.
Bonus: Customize Your Recipes According to Your Desires
- Add superfoods (spirulina, raw cocoa) in small amounts to boost properties.
- Vary dried fruits: apricots, cherries, or cranberries for different colors and flavors.
- Incorporate nut butters (hazelnut, almond, cashew) to diversify textures.
- Try vegan or gluten-free versions by replacing milk and flour.
These adjustments allow you to create an infinite palette of sweets – from energizing post-workout bites to comforting little cookies for snack time. The key is to experiment, observe the texture, aroma, and flavor balance.
Table: Examples of Proportions for 100 g of Raw Dough
| Ingredient | Quantity | Role | Main Contribution |
|---|---|---|---|
| Pitted Dates | 50 g | Binding, sweetness | Fast carbohydrates, fiber |
| Oat Flakes | 30 g | Texture, satiety | Complex carbohydrates, protein |
| Almond Powder | 10 g | Flavor, healthy fats | Monounsaturated lipids |
| Maple Syrup | 5 g | Aroma, sweetness | Minerals, antioxidants |
| Chia Seeds | 5 g | Binder, nutrition | Omega-3, fiber |
FAQ
Q: Can I freeze my treats without altering their taste?
A: Absolutely, freezing is even recommended for raw bites. Wrap them individually or in small portions, then move them from the freezer to the refrigerator 2 hours before eating to preserve the texture.
Q: How can I reduce fat content without losing indulgence?
A: You can replace up to 30% of the nut powder with homemade fruit compote (apple, pear), which adds softness and flavor while reducing fat.
Q: Is it possible to adapt these recipes for gluten-free diets?
A: Yes, just make sure to replace regular flour or oat flakes with certified gluten-free alternatives (rice, buckwheat, puffed quinoa) and check the labels of additives.